
You’ve got your place. The letter has landed, you’ve sorted your accommodation, and now a list of required materials has probably arrived from the college. It’s an exciting, slightly daunting moment. Amidst the list of sketchbooks and obscure-sounding materials is the big one: tools. This is where the real investment begins, and where a lot of new students make their first, most expensive mistakes. The question isn't just what to buy, but what to buy now. This guide is my honest, bench-tested answer to building your first jewellery school tool kit for day one of your BTEC, Foundation, or Degree course in the UK.
Forget the generic lists for a moment. I’m a working jeweller in Birmingham with a Level 7 qualification, and I’ve seen countless students walk into the workshop for the first time. I’ve seen the ones who arrive with a cheap, pre-packaged kit full of junk, and I’ve seen the ones who’ve bought three specialist hammers but don’t have a decent pair of pliers. This article is the advice I wish I’d had: what to invest in, what to ignore for now, and how to build a set of tools that will serve you well through your course and into your career.
What the College Provides (and What It Doesn’t)
First, let’s clear up a common point of confusion. Your college workshop is not an empty room. It will be equipped with the heavy, expensive, and frankly dangerous machinery that you can’t be expected to own.
Typically, the college will provide communal access to:
- Rolling mills
- Pillar drills
- Polishing motors and extraction units
- Soldering hearths with torches (usually Sievert or oxy-propane setups)
- Kilns for enamelling or metal clay
- Casting equipment (centrifugal or vacuum)
- Guillotines and large bench shears
- Anvils, stakes, and bench blocks
What they don’t provide, or what they provide in a state of disrepair, are the personal hand tools. Yes, there will likely be a dusty cabinet of gnarled-looking communal pliers and files. Do not rely on them. These tools have been abused by generations of students. The pliers will have chewed-up jaws that will mar your metal. The files will be clogged and blunt. The saw frames will be bent.
Jewellery making is a craft of precision. You can’t achieve that with a file that skates over the metal or pliers that leave a deeper mark than your hallmark. Your personal tools are an extension of your hands. You develop a feel for them. You learn their specific tolerances. This is why building your own core set of high-quality jewellery course tools is non-negotiable. It’s the foundation for good technique and clean work. It’s also the first step toward thinking about setting up your first jewellery bench when you graduate.
The First Rule: Don't Buy a Pre-Made 'Student Kit'
You will see them advertised everywhere: the "Complete Jewellery Student Starter Kit UK". It arrives in a shiny box and seems like a fantastic deal. It’s not.
These kits are almost always a false economy. To hit a tempting price point, they are filled with low-grade tools made from soft steel, sourced from the cheapest possible factories. The pliers will twist under pressure, the cutters will dent when you look at them, and the files will be dull before the end of your first term. Worse, they often include items you simply won't need for months, like doming punches or disc cutters, while skimping on the absolute essentials.
The single most common problem I see is a student wrestling with a piece of silver, their frustration growing, only to find the problem is their tool, not their technique. Don’t be that student.
The mantra in any serious craft is "buy once, cry once." A pair of Lindstrom pliers might cost £40, while a cheap equivalent is £8. The cheap pair will need replacing within a year and will damage your work in the meantime. The Lindstroms, if cared for, will last you a decade or more. Building your own kit allows you to allocate your budget intelligently, spending good money on the tools you use every single day.
Your Day One Packing List: The Core Kit
This is your shopping list. I’ve broken it down into functional categories and given realistic 2026 prices for good quality, reliable tools from reputable brands (think Vallorbe, Fretz, Maun, Lindstrom). You’re looking at a total investment of around £280–£350. It’s a significant outlay, but every tool on this list will earn its keep.
H3: Measurement & Marking
Precision starts here. If your marking is off, everything that follows will be off.
- Steel Rule (150mm / 6"): A simple, non-negotiable tool. Get one with clear metric and imperial markings. (£5)
- Digital Calipers: Essential for measuring sheet and wire thickness, stone dimensions, and checking tolerances. A basic digital pair from a tool supplier will do the job for around £25. If you see yourself doing a lot of precision stone setting in the future, a Mitutoyo is the gold standard, but that's a £120+ investment for later.
- Tungsten Carbide Scribe: For scratching clean, sharp lines onto metal. Far superior to a steel one, as the point lasts almost indefinitely. (£10)
- Dividers: Look like a compass with two sharp points. Used for scribing circles and 'walking' along a piece to mark out equal divisions. A simple 75mm pair is perfect. (£15)
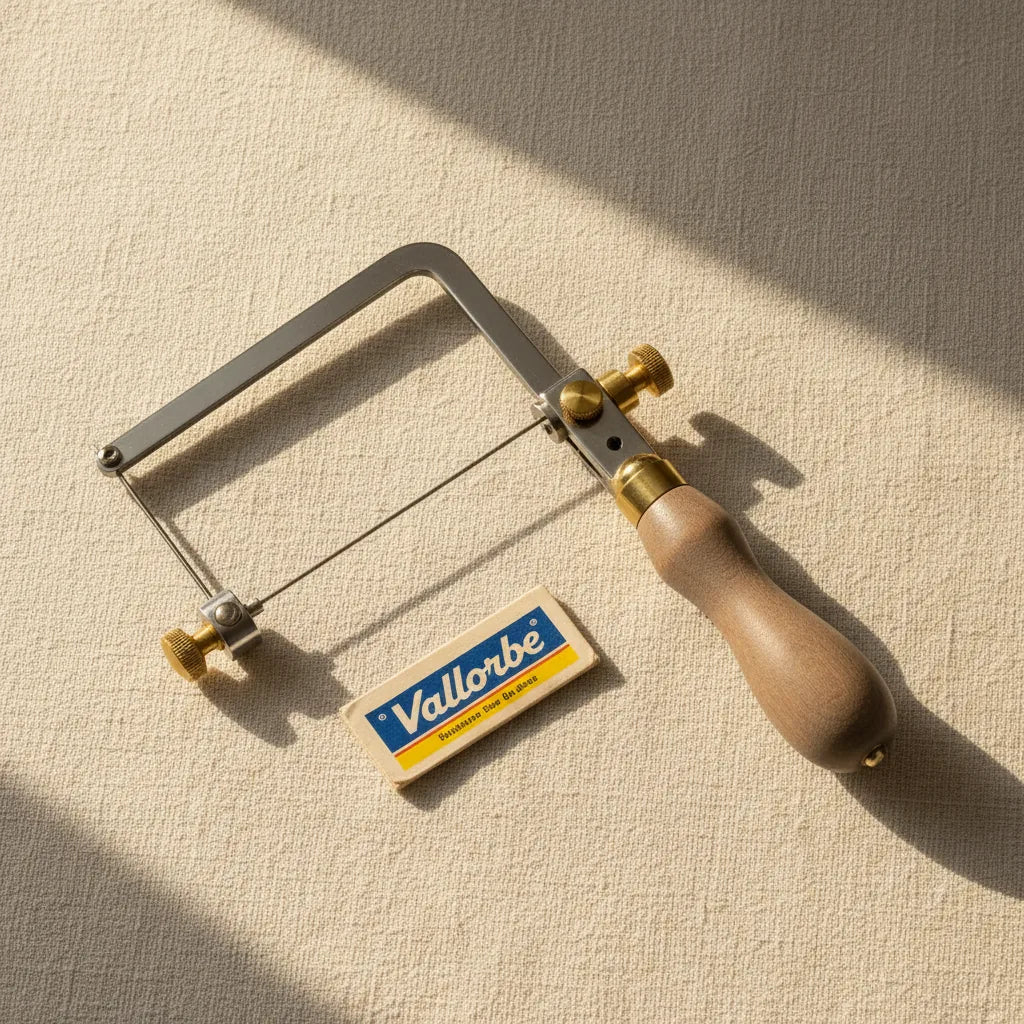
H3: Sawing & Piercing
The jeweller’s saw (or piercing saw) will become your best friend and your worst enemy. A good frame and quality blades make the difference between a clean cut and a pile of broken metal.
- Adjustable Saw Frame: A German-style frame is the standard. An 80mm throat depth is a good all-rounder. The ability to adjust the tension correctly is key. (£20)
- Saw Blades: Don’t cheap out. Vallorbe or Antilope are the brands to trust. You will break hundreds of these, so buy them by the gross (144 blades). Start with a mix of sizes: 3/0 is a great general-purpose size for most sheet work. Get a gross of those, and perhaps a smaller bundle of 2/0 (thicker) and 4/0 (finer). (Approx. £20 per gross)
- Bench Peg & Anvil: Your college bench will have one. It’s the V-shaped piece of wood you saw against. No need to buy your own unless you plan to work from home.
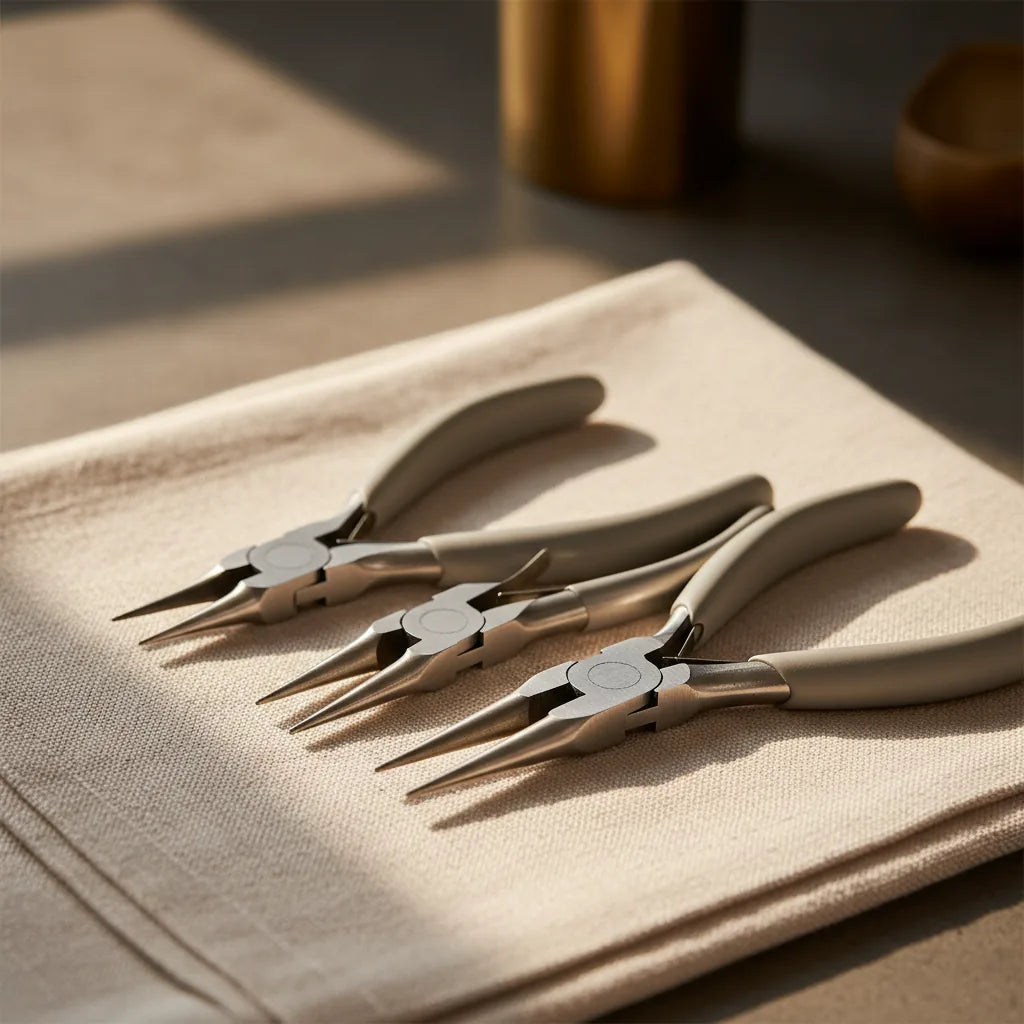
H3: Pliers, Shears & Cutters
This is where you should spend your money. Good pliers have perfectly aligned jaws, comfortable handles, and are made from hardened Sheffield (or equivalent) steel. They close precisely with no gaps. They are the difference between a professional finish and a mangled mess. Browse our full Pliers & Cutters collection to see the range.
- Chain Nose Pliers: Tapered jaws, flat on the inside. For gripping, holding, and bending wire.
- Round Nose Pliers: Conical, round jaws for forming loops and curves.
- Flat Nose Pliers: Wide, flat jaws for making angular bends and holding sheet metal.
- Flush Side Cutters: Absolutely essential. You need a pair that cuts cleanly, leaving a flat surface on one side of the cut. Essential for trimming wire, sprues, and solder pallions.
For these four, look at brands like Lindstrom, Tronex, or Maun. Expect to pay £30–£45 per pair. It’s a painful purchase, but it’s the right one.
H3: Filing & Finishing
Filing is 50% of jewellery making. A good file removes material smoothly and predictably. A bad file skips, clogs, and makes more work for you.
- Needle File Set (Cut 2): You need a set of six essential shapes: flat, half-round, round, square, three-square (triangular), and warding. Vallorbe is the industry standard for a reason; their Swiss-made files are exceptional. A 'Cut 2' is the perfect medium grade for general work. (£55 for a set of 6)
- Large Hand File (6" or 8", Cut 2): A larger 'bastard' or half-round file for removing larger amounts of material quickly and ensuring flat edges on your sheet. (£25)
- Emery Paper: Get a selection of grits: 400, 600, 800, and 1200. You’ll use this for sanding out file marks before polishing. Wrap it around a file or a flat piece of wood to make a sanding stick. (£10 for a selection)
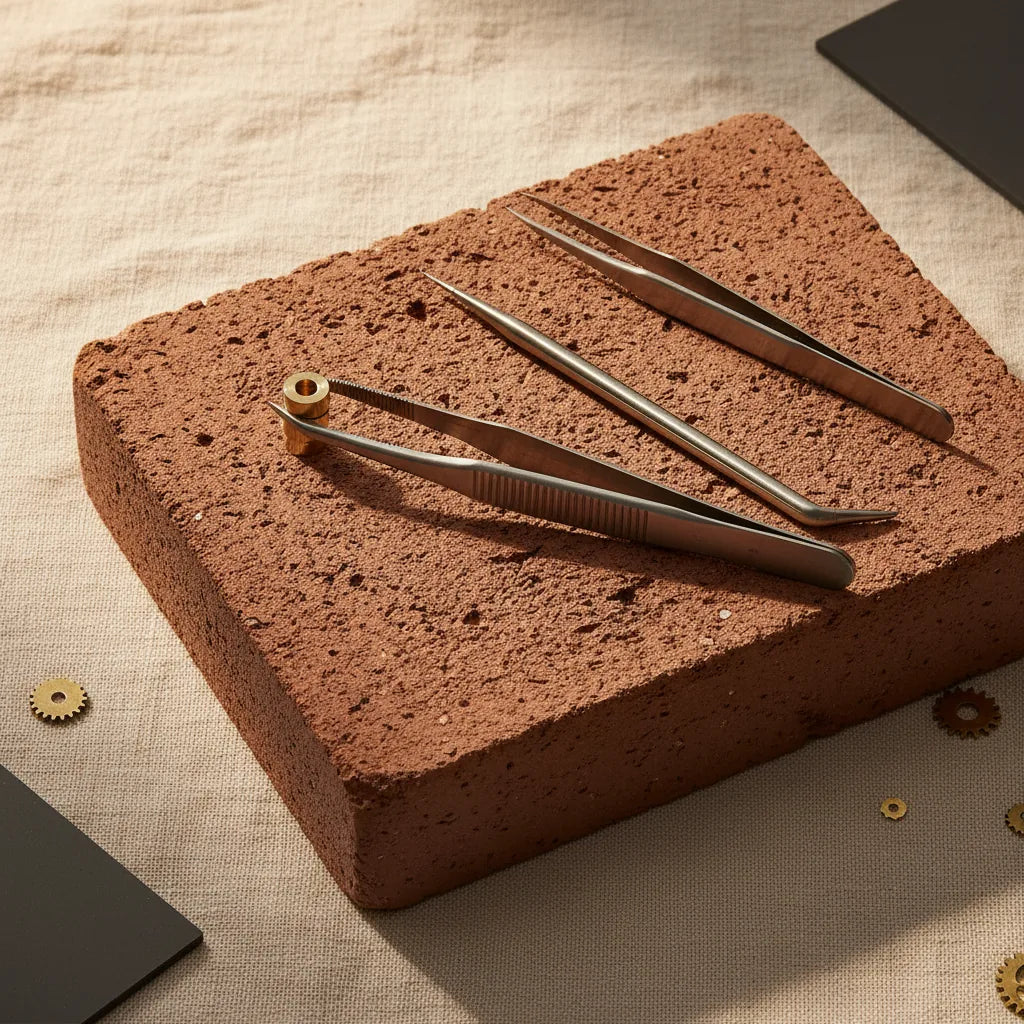
H3: Soldering
Your college provides the heat, but you need the small hand tools for positioning and handling your work. These tools live in the fire, so they need to be robust. Our Tweezers & Soldering Aids collection has everything you'll need.
- Reverse-Action Tweezers (Third Hand): These open when you squeeze them and clamp shut when you release. An absolute must-have for holding pieces in place while you solder. Get one with a fibre grip to reduce heat transfer. (£15)
- Soldering Tweezers: You'll want at least two pairs of fine-point, non-insulated tweezers for placing solder pallions and adjusting components in the flame. Look for stainless steel or titanium. AA or No. 2 patterns are good starting points. (£10 each)
- Titanium Solder Probe: A sharp-pointed titanium stick. Titanium doesn't get 'tinned' with solder, so you can use it to push molten solder around and position components with incredible precision. (£12)
H3: Hammers & Forming
You don’t need a vast array of hammers on day one. You need two core items to cover the basics of shaping and riveting. This is an area where your collection will grow over time. We've written a whole guide on choosing your first jeweller's hammer.
- Ball Pein Hammer: The classic jeweller's hammer. One flat face for planishing and riveting, one rounded 'pein' for texturing and forming. A 4oz (110g) head is a versatile starting weight. (£20)
- Rawhide or Nylon Mallet: For shaping metal without marking or stretching it. Essential for forming rings on a mandrel or shaping bezels. (£18)
You can find these and more in our Hammers & Forming collection.
What You Can Probably Wait to Buy
A good silversmithing school kit or set of art college jewellery tools grows with you. Tutors will introduce new techniques each term, and that’s the time to buy the relevant tools. Rushing to buy everything at once is a waste of money.
Hold off on buying these until you specifically need them for a project:
- Ring mandrel and ring sizers
- Doming block and punch set
- Disc cutter
- Drawplate and draw tongs
- Specialist stone-setting tools (burnishers, pushers, bezel rollers)
- Your own pendant motor (like a Foredom or Dremel)
Many of these will be available in the university workshop to try before you buy. This is a great way to figure out which brands and styles you prefer. For a look ahead at what you might need next, our post on the 12 tools every new silversmith needs is a good reference for your second year.
Keeping It Together: Tool Roll vs. Toolbox
You need a practical way to carry your £300+ investment to and from college. The two main options are a canvas tool roll or a small toolbox.
A tool roll is my preference for the core tools. It keeps your files, pliers, and marking tools separate and protected. When you get to your bench, you simply unroll it, and everything is laid out, ready to go. It prevents your precision pliers from clattering against your files and getting damaged.
A small toolbox or case is better for the bulkier items: your hammer, mallet, consumables like solder and emery paper, and your sketchbook.
The ideal solution? Both. A tool roll for your precision hand tools, which then goes inside a small tote bag or a compact toolbox along with everything else. It’s organised, secure, and professional.
A Final Word from the Bench
Building your first jewellery school tool kit is the first creative act of your course. It's a statement of intent. By choosing your tools carefully and investing in quality, you are setting yourself up for success. You are removing potential barriers of frustration and allowing your skills to develop without being hindered by poor equipment.
This list is a starting point. You will add to it, you will find favourite tools, and you will learn to maintain them. Your tools will become scarred and personalised with the marks of your work, each one telling a story. Look after them, and they will look after you for years to come. That commitment to quality and honest advice is central to how we do things here, as outlined in our editorial standards.
Now, go and make something brilliant.
Ready to start building your kit? Take a look at our curated collections of Hammers & Forming tools, selected for durability and performance at the bench.