
Sterling silver is brilliant to work with right up until you ask it to bend a second time. Hammer it once, planish it, pull it through a draw plate — it gets harder with every blow. Try to bend it again without softening it first and it will crack, fracture, or split open along the work line. The fix is annealing, and once you've done it five times it becomes one of those reflex jobs that takes ninety seconds and saves a piece you'd otherwise scrap.
This guide is the practical bench routine I teach apprentices in the first month: how to anneal sterling silver properly, how to read the heat colour without a thermometer, what to pickle in, and the four mistakes that ruin pieces before you've even reached the hammer. If you've already read Choosing your first jeweller's hammer, this is the post that shows you what those hammers actually do.
What annealing actually is (the metallurgy in two paragraphs)
When you hammer, draw, or bend silver, you're not "moving" the metal in a vague sense — you're physically dislocating the crystal lattice. Grains stretch, slip planes get jammed, dislocations pile up. Mechanically, this is what we mean by work-hardening: the metal stiffens because its internal structure is no longer free to flow.
Annealing reverses this. Heat the metal above its recrystallisation temperature — around 650 °C for sterling silver, well below its 893 °C melting point — and hold it there for thirty seconds. New, stress-free grains nucleate within the deformed structure and grow until they replace the strained ones. The metal is now soft, ductile, and ready to take another round of work. The Society of Jewellery Historians' technical notes describe this process going back to Bronze Age Sumerian smiths, who annealed by burying hot metal in damp ash to slow the cooldown. We don't do that any more, but the underlying physics hasn't changed in 5,000 years.
What you need on the bench
I'll list everything before we start, because annealing while you're hunting for your pickle pot is how you scorch a piece.
- A soldering-grade charcoal block — natural compressed charcoal is the standard reflective surface; it holds heat back onto the workpiece and won't pull thermal energy out into the bench. Our 120 × 50 mm charcoal block holder in anti-magnetic stainless steel protects the bench underneath and stops the block sliding mid-operation.
- A propane or butane torch — for sterling silver up to roughly 2 mm thick, a butane jeweller's torch is plenty. Anything heavier than that, switch to propane / MAP. (We don't currently stock torches; for UK buyers, the Sievert range from Cooksongold is the trade standard.)
- A pair of cross-lock soldering tweezers — for holding the workpiece when it's too hot to handle but not yet on the block. The 8-inch anti-magnetic Japanese steel soldering tweezers are the ones I use daily — anti-magnetic matters because hot steel against a magnetised tip drags filings into the join.
- A titanium soldering pick — to move the piece across the block without scuffing it. The 3-piece titanium soldering pick set is the right tool — titanium doesn't conduct heat into your hand and won't fuse to a half-molten piece the way steel does.
- A pickle pot with safety pickle (sodium bisulphate) — heated to ~60 °C, this dissolves the firescale (copper oxide) annealing creates on sterling. No pickle = grey, blotchy surface that won't polish out cleanly.
- A "third hand" or helping-hands rig — useful for holding chain or wire that you can't lay flat on the block. The heavy-duty third-hand base with double clamp covers most awkward holds.
Set up: dim the bench light slightly before starting. You'll be reading colour in the metal — annealing colour is subtle, and a bright overhead lamp washes it out. This is the single biggest thing apprentices get wrong on day one.
The step-by-step
This is for sterling silver sheet or wire up to about 2 mm thick. For heavier stock the procedure is the same, just with a hotter flame and a longer dwell.
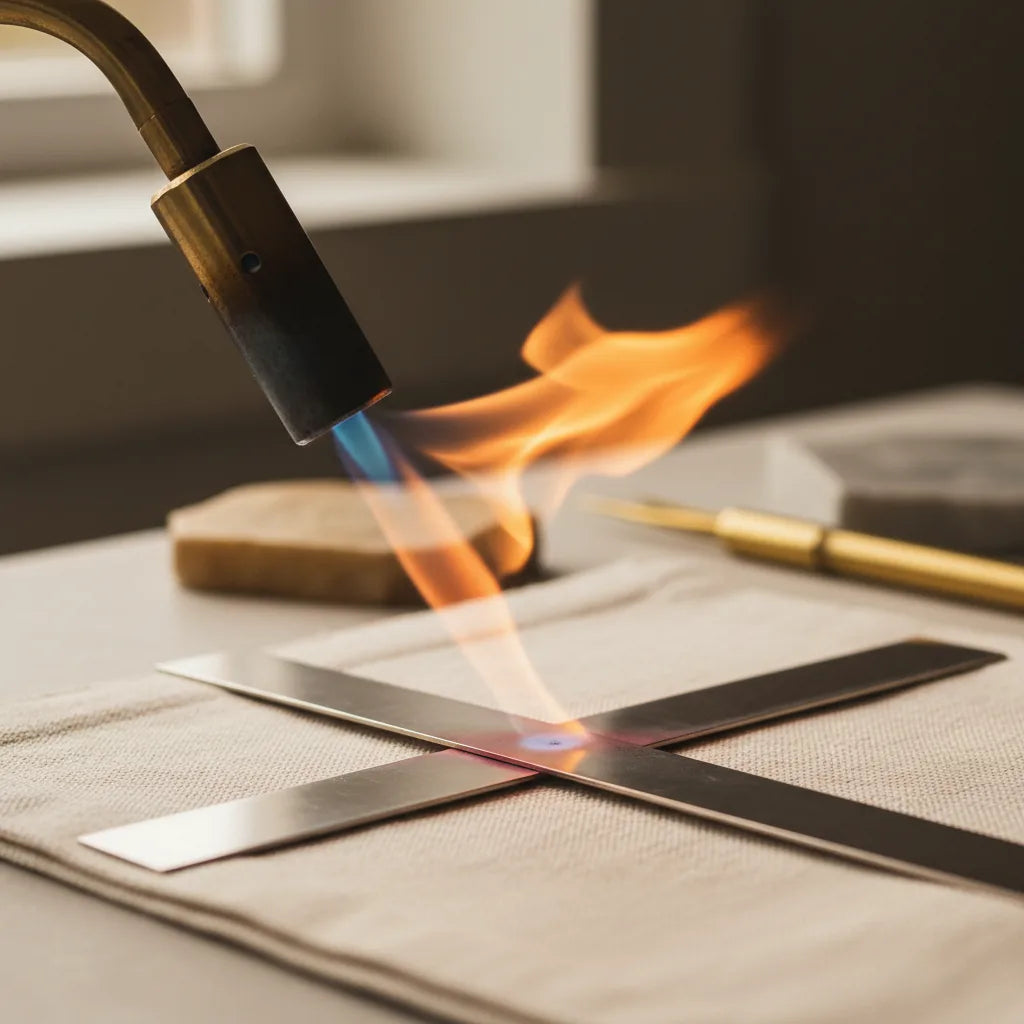
Step 1 — Position the work on the block
Lay the piece flat on the charcoal block. If it's chain or wire that won't lie flat, prop it on a few charcoal offcuts or hold it in the third hand so the flame can wrap around it evenly. The biggest enemy of even annealing is one part of the piece getting hot while another stays cool — the colder section won't soften, and when you hammer it next, it cracks at the boundary.
Step 2 — Heat with a brushing motion, not a fixed spot
Light the torch with a soft, blue-cored flame about 30–50 mm long (the exact size depends on the torch, but you want the inner cone clearly visible — that's the hottest point). Don't aim it directly at one spot; sweep it across the piece in slow, overlapping passes. Think of brushing the heat onto the metal, not drilling it in.
Step 3 — Read the colour, not the time
This is the bit that separates trained jewellers from beginners. Watch the metal carefully. You'll see:
- First: the surface starts to look hazy as any drawing fluid or oils burn off
- Then: a faint warm grey wash spreads across the metal
- Then — the moment you're waiting for: a uniform dull cherry-red glow, like a hot ember in a fireplace dimmed by daylight. In a bright workshop you may barely see it; in a slightly shaded bench you'll see it clearly. This is around 650–680 °C — exactly the recrystallisation temperature for sterling.
Hold the heat at this point for roughly 15–20 seconds, sweeping continuously. Don't push past dull cherry into bright orange or red — you'll start to melt your solder joints and approach the silver's own melting point.
Step 4 — Cool and pickle
Withdraw the flame. Wait a few seconds for the glow to fade — there's no need to quench, and quenching sterling can introduce its own stresses. When the colour has fully dropped (the piece will still be too hot to touch), pick it up with the cross-lock tweezers and drop it into warm pickle.
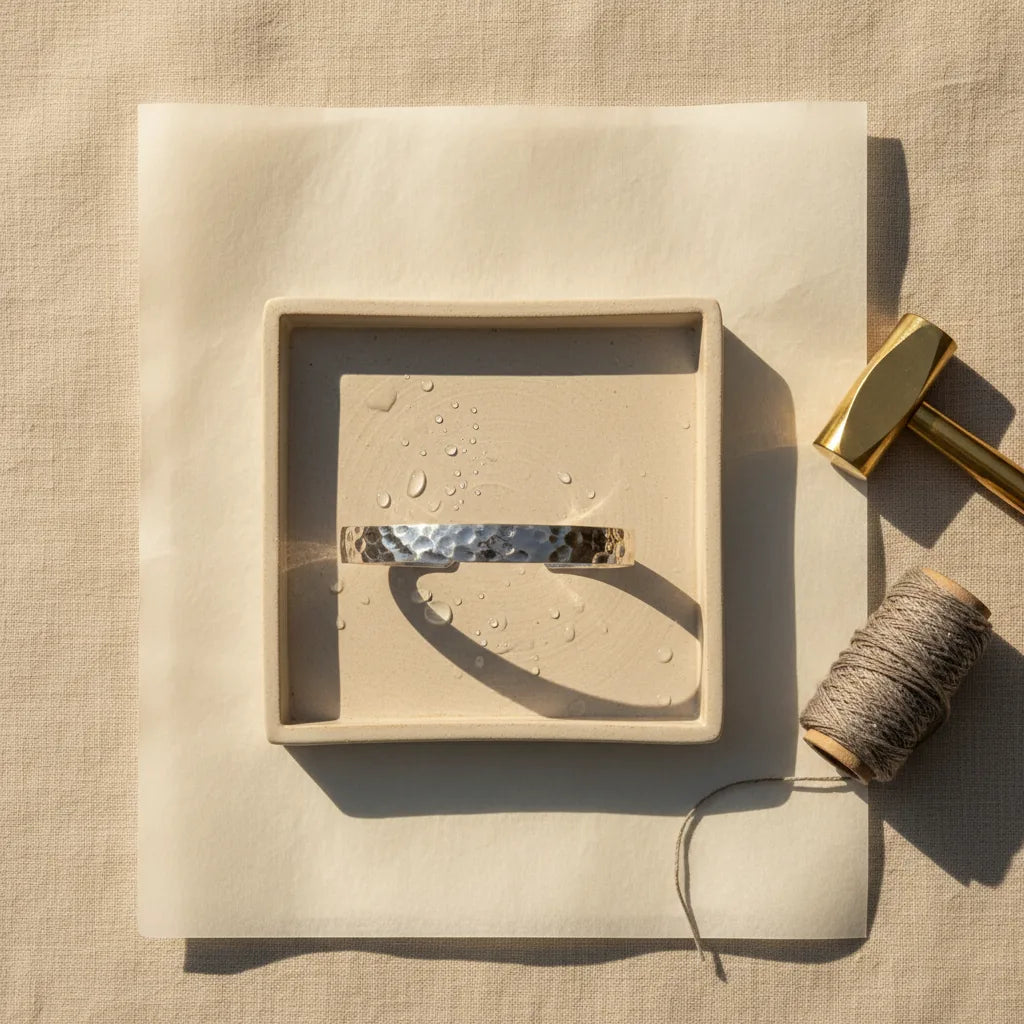
Pickle for 2–5 minutes — long enough to dissolve the copper oxide and leave the surface a pale matte cream-white. Rinse in water, then dry. The piece is now in its soft, annealed state and ready for hammering, drawing, or forming.
Forging silver: what changes once it's annealed
Annealing gets you back to a soft, ductile starting point. Forging is the controlled use of hammer blows to move the metal — to taper a wire, raise a bowl, or compress an edge for setting.
A few principles that have made the difference for me at the bench:
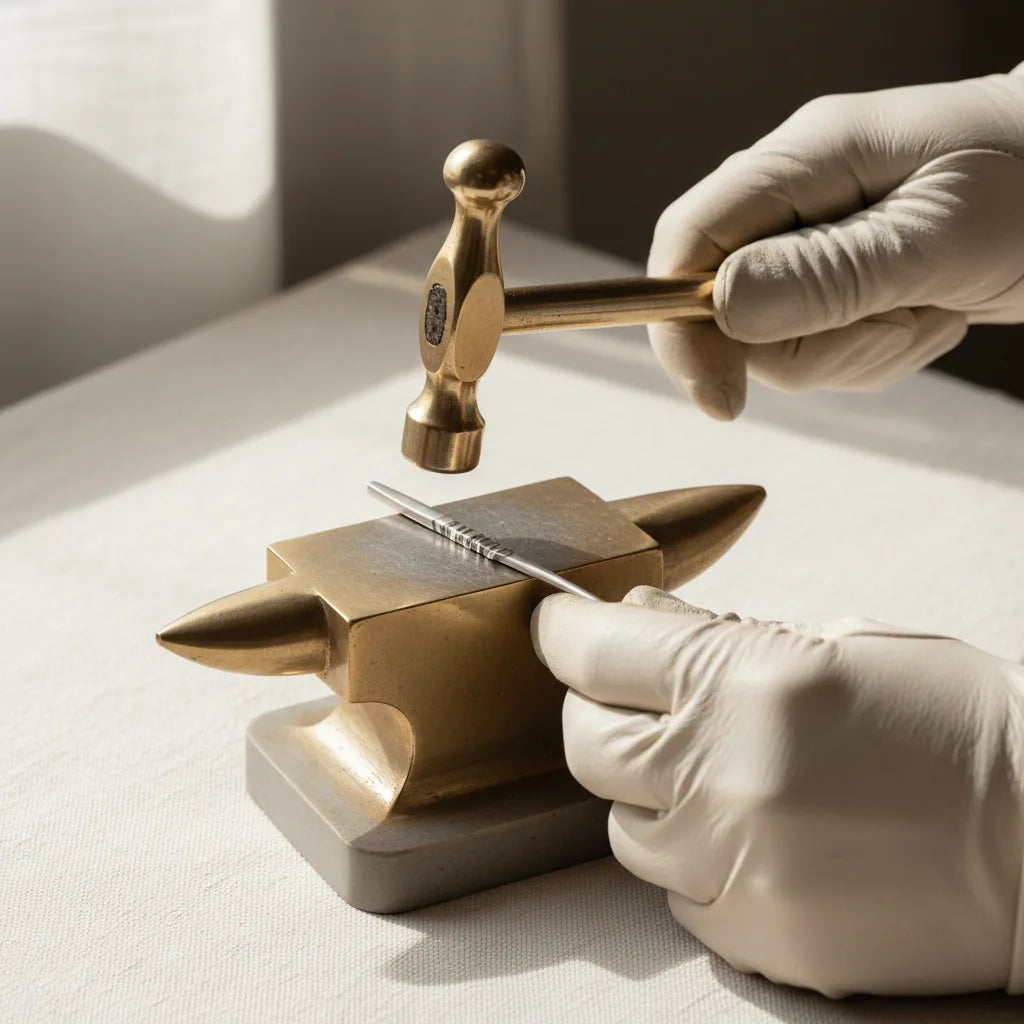
Forge with the cross-peen end of your chasing hammer for tapers. The narrow cross-peen face concentrates force into a line, drawing the metal out in the direction perpendicular to the line. Strike a wire end with the cross-peen across its short axis, working from the tip down, and you'll taper it cleanly. Our 22mm German-style bow-face ball-peen chasing hammer is the one I keep dedicated to forging — its bow-faced ball end is forgiving on the rebound.
Re-anneal every time the metal stiffens. You'll feel it: the hammer rings differently, the metal stops moving under the blow, the strike marks become shallower. That's the metal telling you it's saturated. Stop, anneal, pickle, return. Trying to push through this is the most common cause of cracked pieces — and it's also why every traditional silversmithing book recommends an annealing cycle for every significant change of section.
Use a planishing hammer to finish, not to forge. Planishing isn't forging — it's surface-trueing. Once you've forged a shape with the chasing hammer's ball or peen, switch to a 16 oz planishing hammer for the final pass. The flat polished face evens out the small chasing marks and work-hardens the surface back up — the desired end-state for most finished pieces.
The four mistakes I see most often
1. Annealing under bright light. You won't see the colour shift. You'll either underheat (no annealing happens; piece still cracks) or overheat (firescale, solder loss, grain growth). Dim the bench light or anneal in a slightly shaded corner. This single change fixes 70% of beginner annealing problems.
2. Letting the piece glow bright orange. Bright orange is approaching the solder flow temperature for hard silver solder (~750 °C) and getting close to the melting point of sterling itself (~893 °C). Dull cherry only. If you see orange, withdraw immediately.
3. Skipping the pickle. Annealing produces firescale — copper oxide that sits in a microscopically thin layer on the surface. Polish it without pickling and you'll get a permanent ghosted shadow that no amount of buffing removes. Pickle every time.
4. Working hardened silver "just a bit more." It will crack. There's no trick to push past a work-hardened state, and trying always costs you more time than the 2-minute re-anneal you skipped.
Frequently asked
What temperature does sterling silver anneal at?
Around 650–680 °C — visible as a dull cherry-red glow in a slightly dimmed workshop. Below this temperature no recrystallisation happens; above ~750 °C you start risking solder joints and grain growth.
Can I anneal silver with a kitchen blowtorch?
For thin sheet and wire, yes — a 1300 °C culinary butane torch will get sterling to annealing temperature. For sheet over 1 mm or any piece bigger than a small ring blank, you'll struggle to maintain even heat. Use a proper jeweller's propane torch for anything substantial.
How many times can I anneal a piece of silver?
Effectively unlimited, as long as you're not overheating. Each anneal cycle returns the metal to its soft, ductile state. The 20th anneal of a piece is no different from the first.
Do I need to quench silver after annealing?
No. Air-cool to black, then pickle. Quenching is for hardenable alloys like high-carbon steel — sterling silver doesn't benefit from quenching and can pick up minor stresses if quenched while still showing colour.
Is pickling sterling silver dangerous?
Sodium bisulphate pickle is mildly acidic. Wear safety glasses, keep it ventilated, use copper or plastic tongs (steel tongs in pickle plate-out copper onto every piece in the pot), and don't drink the stuff. That's the full risk profile.
Where to go next
If you've not yet kitted out your bench: start with Choosing your first jeweller's hammer for the hammer selection, then the Tweezers & Soldering collection for the consumables and clamping rigs to set up the heat side of the bench.
Annealing is one of those skills that goes from "anxious" to "routine" surprisingly fast. After about ten cycles you'll stop second-guessing the colour and start moving silver like it actually wants to be moved.
— K.