
The maker's mark is your signature. It tells customers, future buyers, and (eventually) the Assay Office who made the piece. Done well, it's a small, sharp, perfectly aligned impression that adds character. Done badly — and beginners make the same mistakes consistently — it's a smudged, doubled, off-centre, or barely-visible mess that has to be filed out and re-stamped.
This guide is the bench technique I teach in the first month of any silversmithing course: how to set up the workpiece, hold the stamp, deliver the blow, and recover when a stamp goes wrong. It applies to maker's marks, fineness stamps (925, 999), date letters, and personalisation lettering using alphanumeric punch sets. The fundamentals are identical across all of them.
This is the companion to Disc cutter sets explained — both are part of the Punches & Stamps collection toolkit.
What you'll need
The kit is small but each piece has a specific job:
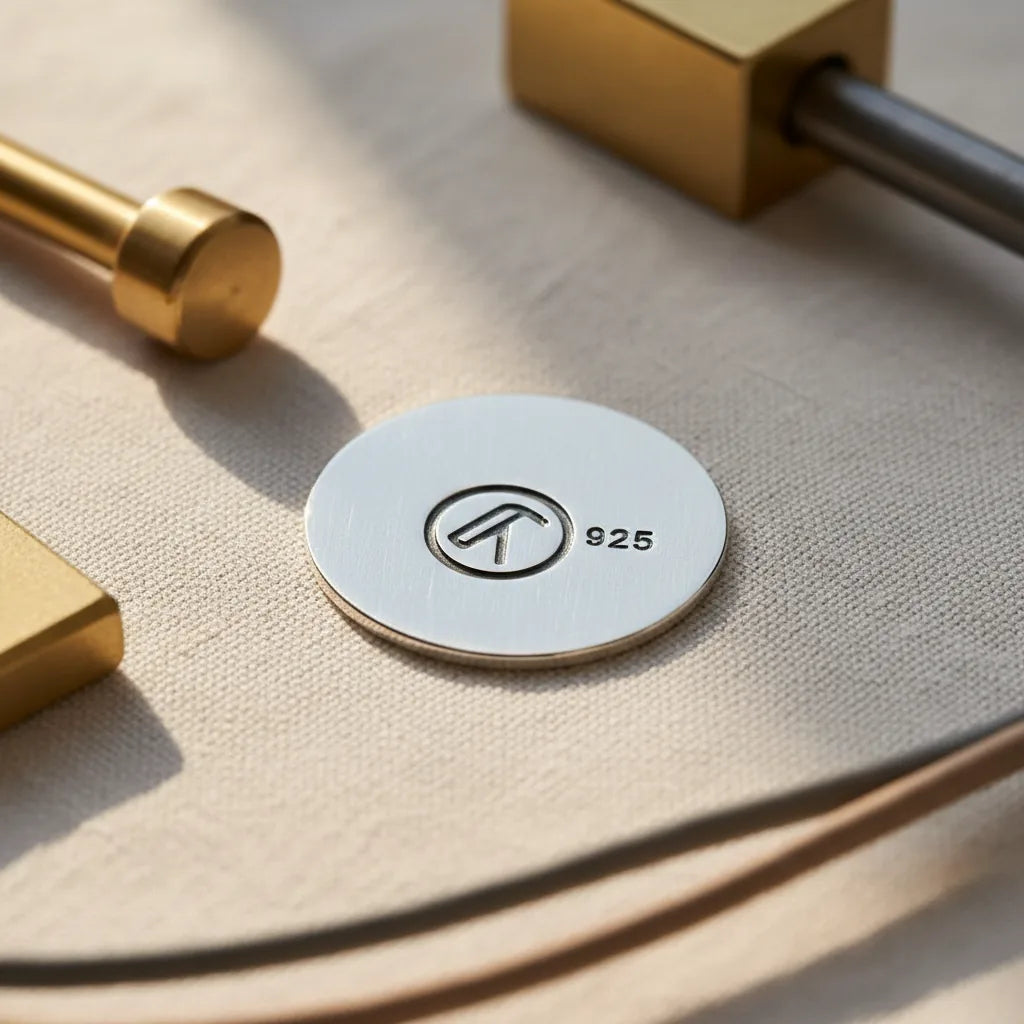
- A maker's stamp — either a custom-engraved punch with your initials or business mark, or a pre-made stamp for fineness marks. The STERLING metal jewellery stamp straight punch bar is the standard "STERLING" fineness mark. For your personal maker's mark, you'll need to commission a custom punch from a UK steel-stamp engraver (e.g. Stuart Stamps, Birmingham — they're trade-standard).
- An alphanumeric punch set — for date letters, personalisation, batch numbers. The 37-piece alphanumeric set 3 mm letters covers compact stamping work; the 5 mm version with storage cases is for larger, more visible lettering.
- A heavy stamping hammer — the 1.75 lb square-head stamping hammer is the right tool. Anything lighter than 1.5 lb and your stamps will be shallow; anything over 2.5 lb and you lose control.
- A flat steel anvil block — needs to be hard, flat, and heavy. Anything that won't move when struck. A small jeweller's anvil, the back face of a disc cutter, or a dedicated steel bench plate. Wood, plastic, and aluminium are all unsuitable — they absorb the strike force and produce shallow stamps.
- A thumb safety holder — once you've hit your thumb hard enough to bruise a knuckle, you'll buy one of these. The thumb safety punch stamp holder keeps your fingers clear of the strike zone. A £10 insurance policy.
That's the kit. Total cost: under £80 for the basics if you already have a stamping hammer.
The legal context: maker's marks in the UK
Before getting to technique, the legal framing. The Hallmarking Act 1973 governs precious-metal hallmarking in the UK. The short version of what matters at the bench:
- Pieces under 7.78 g of silver are exempt from compulsory hallmarking. You can sell them with just your own maker's mark and fineness stamp.
- Pieces 7.78 g and above must be hallmarked by an Assay Office (Birmingham, London, Sheffield, Edinburgh). Your maker's mark stays on the piece, plus the Assay Office adds their punches.
- Sponsor's mark registration — to use a maker's mark on hallmarked pieces, you must register a "sponsor's mark" with an Assay Office. Costs about £75 and lasts 10 years. The British Hallmarking Council's guidance walks you through it.
- Fineness stamps — "925" or "STERLING" for sterling silver, "999" for fine silver. You can apply these yourself on under-7.78 g exempt pieces; on hallmarked pieces, the Assay Office stamps the fineness.
Practically: if you're making and selling small pieces (earrings, pendants under 7.78 g), you'll mostly self-stamp. If you're making rings and statement pieces, the hallmark goes via the Assay Office.
Where to stamp (and where not to)
The location matters because the stamp adds a small but permanent compression to the piece:
For rings: inside the shank, away from the join and away from any stone seat. The compression of the stamp ever-so-slightly distorts the metal around it — you don't want this near a structural feature.
For pendants and earrings: on the back face, in a corner, away from any soldered joins or attachment points. The stamp impression must be perpendicular to the surface; angled stamps look amateurish.
For bracelets and bangles: on the inside face, away from the clasp mechanism.
Never stamp:
- Across a soldered join (compression weakens the join)
- On a curved surface without backing (the stamp won't sit square; impression doubles)
- Through a polished surface that you can't refinish (compression always leaves a slight haze around the impression that needs polishing out)
For finished pieces with a non-trivial polish, stamp BEFORE the final polish, never after.
The technique: a single confident blow
This is the bit that takes practice. The principle is one blow, dead-on, full force. Tapping multiple times produces doubled impressions. Hesitating produces shallow stamps. The British silversmithing trade has a saying: "Strike like you mean it." Always.
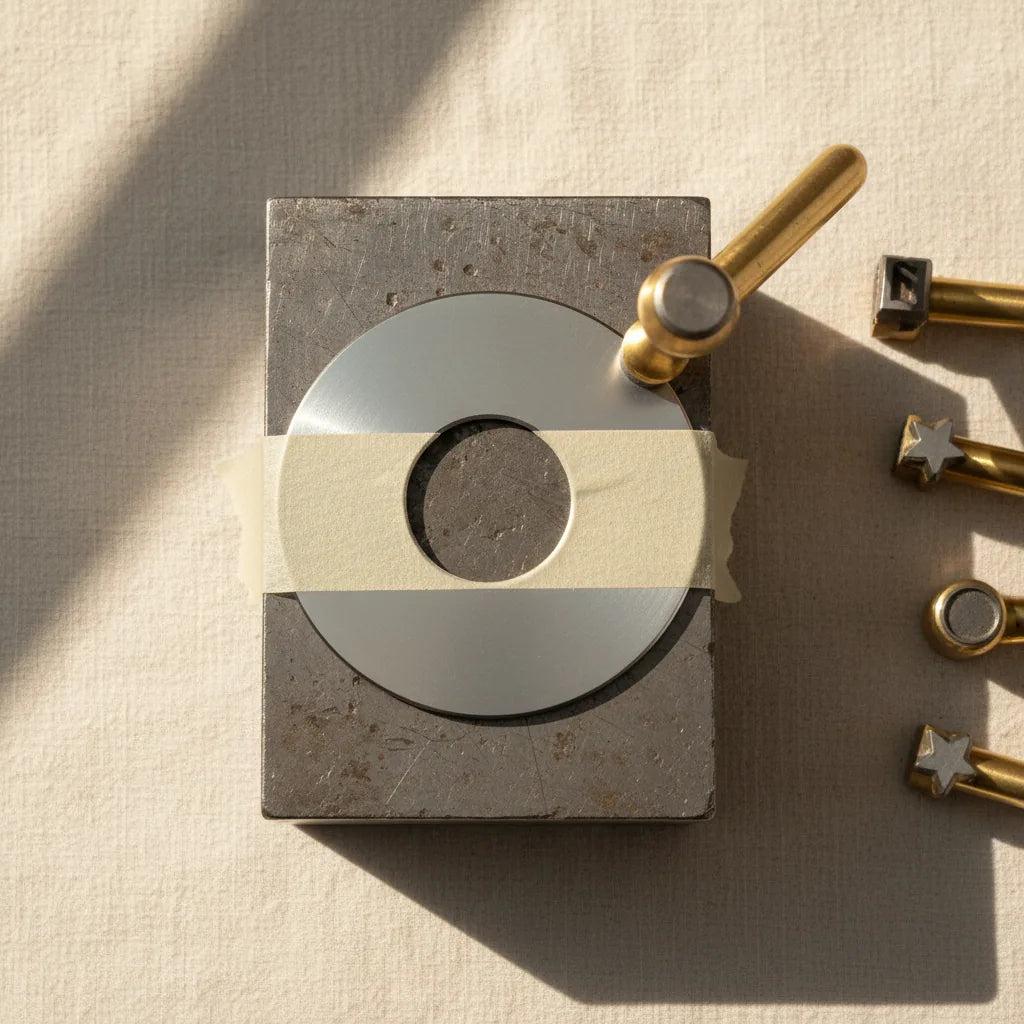
Step 1 — Anchor the workpiece
The piece must not move when struck. Three options:
- Flat pieces (sheet, discs): a strip of masking tape across the corners holds the piece against the anvil. Cheap, effective.
- Rings: hold the shank against a small steel block, gripped firmly with your non-dominant hand. The block presses against the bench so the ring can't shift.
- Pendants with bails: tape the bail down, leave the body free. Stamp the body.
Step 2 — Position the stamp
Hold the stamp vertically (perpendicular to the workpiece surface). The stamp's working face must contact the metal across its full impression — no tilt, no edge contact.
If you're using a thumb safety holder, the stamp goes in the holder and the holder rests against the metal. If you're freehanding, grip the stamp shaft firmly with your non-dominant hand, between thumb and forefinger, with the stamp's working end touching the workpiece and the back end (where the hammer hits) facing up.
The angle test: look down the long axis of the stamp from above. The stamp should disappear behind your hand — meaning it's perfectly perpendicular. If you can see the working tip, it's tilted.
Step 3 — Strike
One blow with the stamping hammer. Aim at the centre of the stamp's back face. Full force. Don't tap to "test" — just strike.
For a 3 mm letter stamp on 0.8 mm sterling silver: about 70% of full force from a 1.75 lb hammer is the right energy. For a 5 mm letter stamp: 90% of full force. For a sterling fineness stamp (typically wider working face): full force.
Step 4 — Inspect
Lift the stamp away cleanly. The impression should be:
- Sharp on all edges (no rounded "ghosted" outlines)
- Even in depth across the full impression
- Square to the surface (not angled)
- Single (not doubled)
If it's good, move on. If not — see the recovery section below.
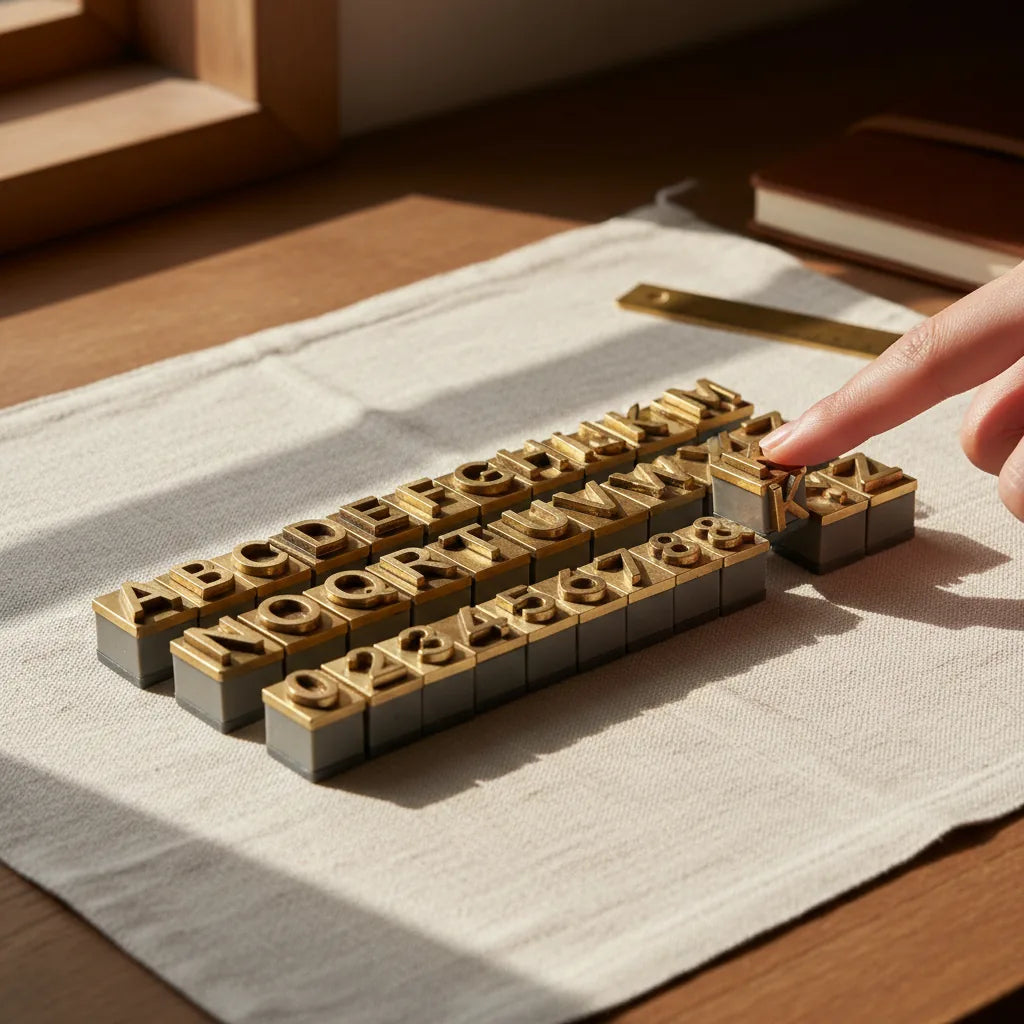
For multi-letter stamping (alphanumeric)
When stamping a name, date, or batch code with individual letter stamps, alignment matters as much as depth. Two approaches:
Eyeballing it (for short, casual stamping like "K Y" initials): mark the starting position with a pencil dot, stamp each letter with light spacing between, accept slight alignment variation as part of the handmade aesthetic.
Using an alignment guide (for production work or anything requiring straight lines):
- Tape a thin steel ruler against the bench so its edge runs across the stamping area
- Position the stamp shaft against the ruler edge for each letter
- The ruler keeps each stamp at the same vertical position
- Result: a perfectly straight line of letters
For 5+ characters, alignment guides aren't optional. The hand alone isn't accurate enough.
Common failures and how to recover
The recovery techniques depend on the failure mode:
Shallow stamp (impression too faint)
- Re-strike: with the workpiece still in position, re-place the stamp in the existing impression and strike again with more force. If the stamp registers exactly in the prior impression, you'll deepen it cleanly. If it shifts even slightly, you'll get a doubled impression — see below.
Doubled stamp (two overlapping impressions)
This is the most common beginner failure. There's no perfect fix. Options:
- Light file + polish out and re-stamp: file the doubled stamp down with a fine file, polish the surface, restamp in a slightly different position. Takes 5–10 minutes.
- Embrace the doubling: if the piece is a non-precious test, sometimes you can live with it. On a customer piece, never.
Angled stamp (one edge deep, other edge shallow)
The stamp wasn't perpendicular to the surface. Recovery:
- For minor tilt: file the shallow side down, polish. The impression now reads as slightly compressed, but legible.
- For severe tilt: file out completely, polish, restamp.
Off-centre / misaligned stamp
- For stamps with surrounding space: live with it; the asymmetry reads as handmade.
- For inside-ring stamps that hit the join: file out, polish, restamp in a clear location.
Stamp maintenance
Steel stamps need almost no maintenance, but the small jobs matter:
After every session: wipe the stamp tips clean. Any silver residue left on the working face transfers to the next stamp and shows up as a haze in the impression.
Yearly: light oil the stamp shafts to prevent rust. Working faces are usually hard enough not to rust, but the shafts will pit in a humid workshop.
As wear shows: when stamp impressions start reading "soft" (less crisp than when new), the stamp's working face has worn slightly. Either:
- Polish the face flat with very fine emery paper (preserves the design)
- Replace the stamp (for cheap stamps under £15, this is often the right call)
For a custom-engraved maker's stamp from a quality engraver, a face polish is the standard maintenance every 5–10 years.
Frequently asked
Where can I get a custom maker's mark made in the UK?
Stuart Stamps in Birmingham is the trade-standard engraver — they make sponsor's marks for jewellers nationwide, in steel that lasts decades. Cost is around £40–£70 for a basic two-letter mark. Allow 2–3 weeks for production.
Can I use a pre-made font from an alphanumeric set as my maker's mark?
Legally for hallmarking purposes, your sponsor's mark must be unique and registered with the Assay Office. Off-the-shelf alphanumeric stamps don't qualify. For unregistered self-stamping on exempt pieces, technically yes — but the maker's-mark community generally considers a custom-engraved mark the proper way.
Why does my "STERLING" stamp sometimes leave only a partial impression?
Three likely causes: (1) the metal beneath isn't fully annealed, so the impression depth varies across the stamp's width; (2) the workpiece is on a soft backing (anything other than steel); (3) you're not hitting hard enough. Increase the force, anneal first, and ensure your anvil is steel.
How deep should a maker's mark be?
Just deep enough to be clearly legible — typically 0.2–0.3 mm into a 0.8 mm sheet. Deeper than that and you risk distorting the piece around the impression; shallower than 0.15 mm and the mark wears away over years of customer wear.
Can I stamp gold?
Yes — gold stamps the same way as silver. Be careful with karat: 9 ct and 14 ct stamp easily; 18 ct and higher are softer and may distort slightly around the impression. Anneal first regardless of karat.
Where to go next
Start with the 37-piece 3 mm alphanumeric set, the STERLING fineness stamp, and a 1.75 lb stamping hammer. Those three cover almost all self-stamping needs for the first year.
Browse the Punches & Stamps collection for the full kit.
— K.