
Drilling and burring is where the bench gets its first taste of power tools, and where a lot of beginners either snap expensive burs or skate a drill bit across a ring and gouge it. Both problems come from the same place: treating a rotary tool like a drill from the shed. At the bench, the cutter does the work slowly and you barely push at all.
Get the basics right and a pendant motor with a tray of burs becomes the most versatile thing you own — drilling holes for piercing, cleaning up castings, cutting seats for stones, and texturing. This guide follows on from needle files explained: once you can saw and file an edge, drilling and burring is how you add holes, seats and detail. Everything here pairs with the Punches & Stamps collection.
Drilling a clean hole in metal
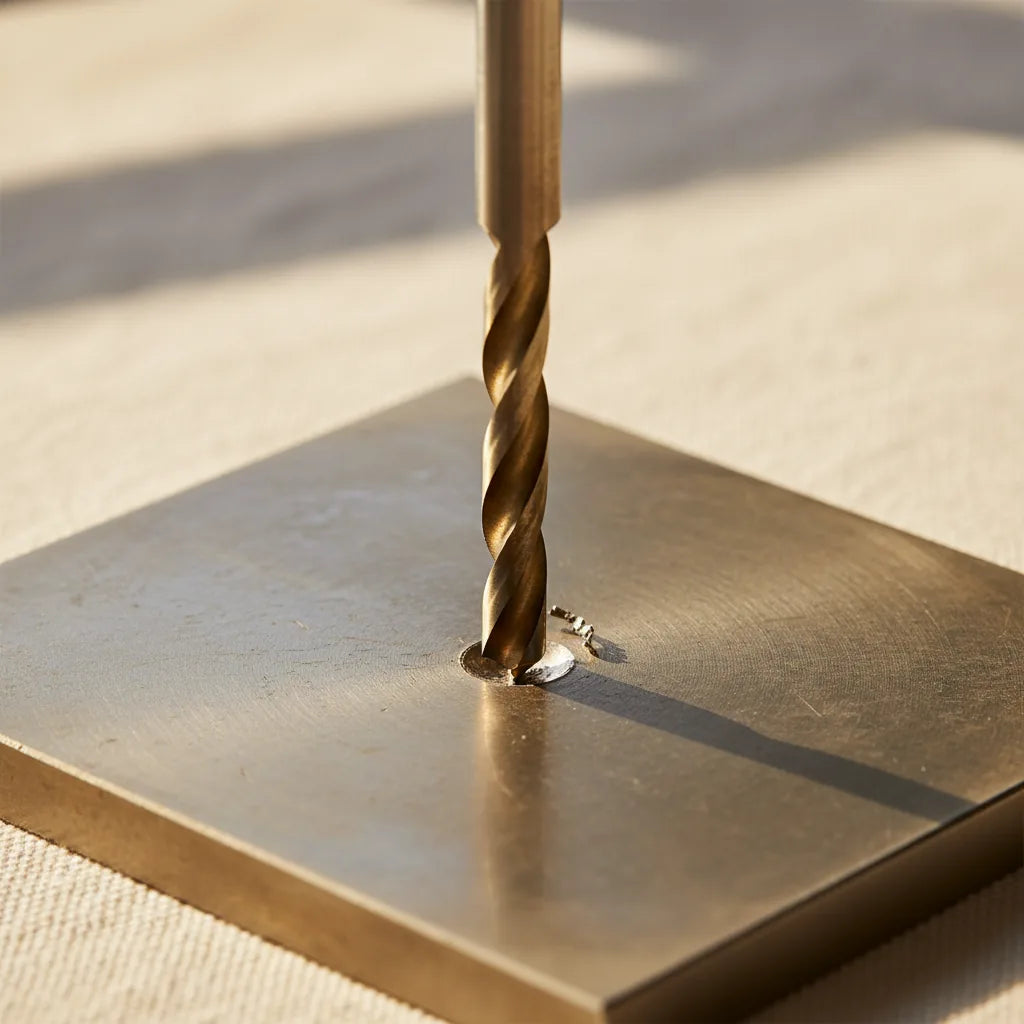
The single biggest mistake is letting the drill bit wander before it bites. Here's the sequence that stops it:
- Mark and centre-punch. Scribe where the hole goes, then tap a centre punch (or an automatic punch) to make a small dimple. The drill tip drops into the dimple and starts true instead of skating across the surface.
- Support the work. Clamp it or rest it firmly on a V-slot bench pin — never hold thin sheet in your fingers; a grabbing bit can spin it into a blade.
- Lubricate. A touch of cutting oil, beeswax or even spit on the bit reduces heat and stops it snapping in the hole. Twist drills for jewellery are tiny (0.8–1.5mm) and snap if they overheat or bind.
- Low speed, light pressure, let it cut. Run the motor slowly, ease the bit in, and let it clear. Pushing hard is how you snap a 1mm bit off inside your work — a genuinely annoying thing to remove.
- Ease off as it breaks through. The bit can grab as it exits. Reduce pressure for the last fraction.
A drilled pilot hole is also how you start internal piercing — thread a saw blade through it and cut out a window, exactly as in how to use a jeweller's saw.
What a bur actually is
A bur is a small rotary cutter on a shank (usually 2.35mm / 3/32" or the 1/8" shank our set uses) that fits a pendant motor, flex-shaft or rotary tool. Where a drill makes a hole, a bur shapes — it removes metal in a controlled way for cleaning, seating and texturing.
Our 30-piece diamond bur set is a sensible starting tray because diamond burs cut hard materials, stay sharp, and don't need the constant re-sharpening that cut-steel burs do.
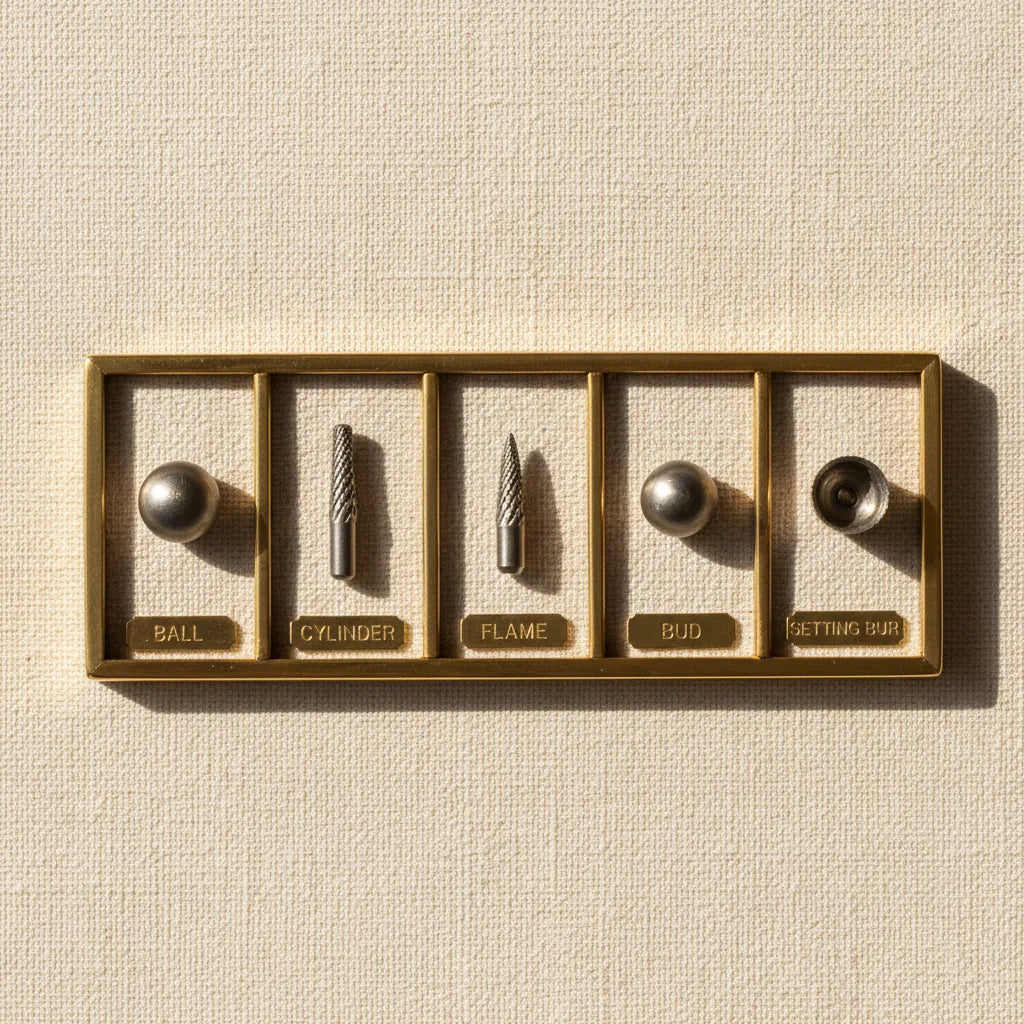
The bur shapes and what each one does
You'll reach for five shapes constantly:
- Ball / round bur: the most useful. Cleans up drilled holes, removes casting marks, cuts decorative dimples, and — crucially — cuts the seat a stone sits in. The size of the ball matches the stone.
- Cylinder (straight): flat-bottomed channels, widening slots, levelling inside surfaces.
- Flame: tapered point for getting into tight recesses and texturing.
- Bud (egg/tear): rounded point for hollows and undercuts, cleaning behind detail.
- Setting / hart bur: an angled cone specifically for cutting the bearing that a faceted stone's girdle rests on. This is the one you graduate to when you start setting faceted stones.
For cabochon work, the ball bur is the hero — it cuts the ledge a cab sits on inside a bezel, which is exactly where bezel setting for beginners picks up.
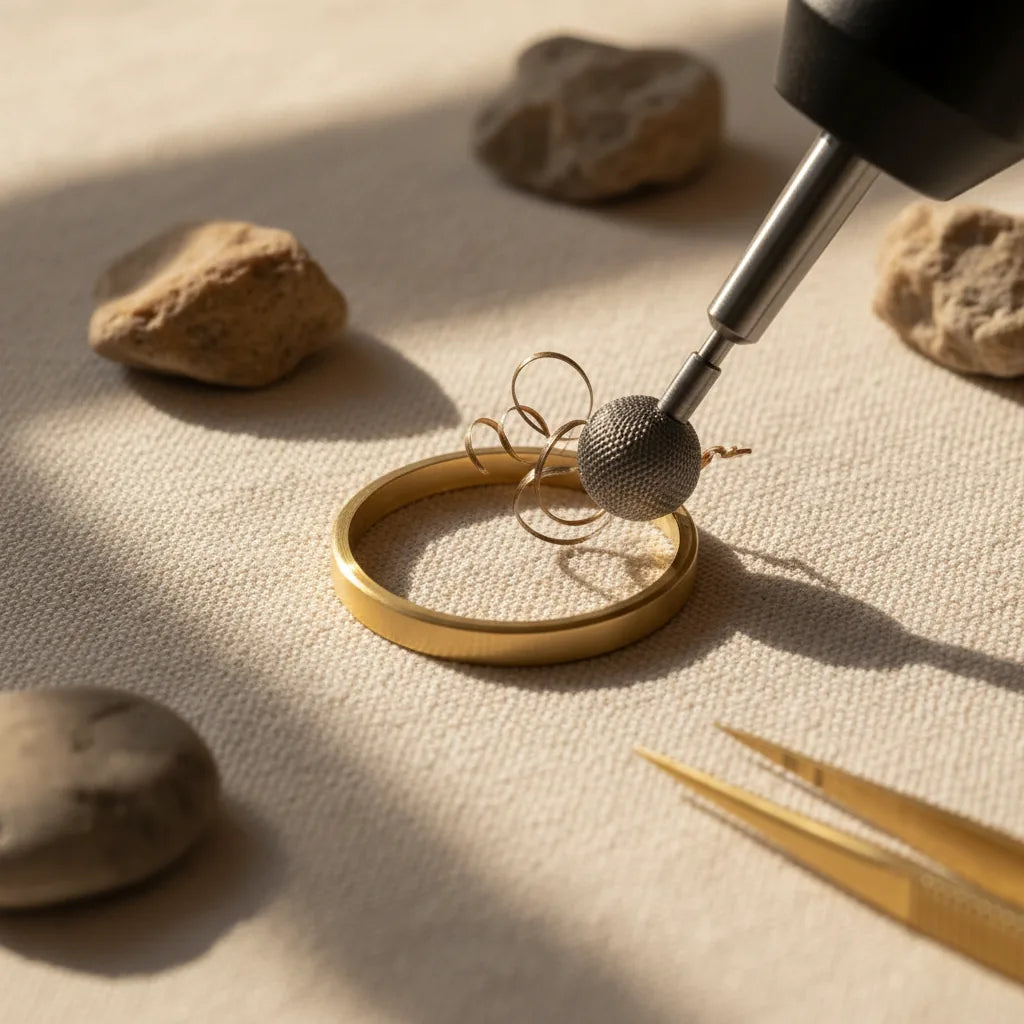
Using burs without wrecking them (or the work)
- Let the bur cut — don't lean on it. Same rule as the saw and the file. Pressure overheats diamond burs and breaks cut-steel ones. A light touch and the right speed do the work.
- Match speed to size. Small burs can run faster; large burs slower. Too fast on a big bur and it grabs and skips across your piece.
- Keep it moving. Dwelling in one spot overheats the metal and the bur, and burns a pit. Use small, sweeping passes.
- Lubricate for metal, run dry for wax. A little wax or oil on metal; nothing on carving wax (see wax carving tools: how to choose your first set).
- Secure everything and protect your eyes. Burs throw fine swarf. Safety glasses, tied-back hair, sleeves clear.
Drilling and burring in the wider toolkit
Burs overlap with stamping and forming tools, which is why they live in Punches & Stamps alongside disc cutters and dapping punches. If you're deciding between punching discs and sawing them, the trade-offs are in disc cutter vs jeweller's saw and the dedicated disc cutters guide. For doming those discs once cut, see doming block vs dapping punch set.
Frequently asked
How do I drill metal without the bit slipping?
Centre-punch a small dimple first so the drill tip has somewhere to bite, support the work on a bench pin, lubricate the bit, and run slowly with light pressure. The dimple is what stops the wandering.
Why do my drill bits keep snapping?
Jewellery bits are tiny and snap from heat and force. Run at low speed, lubricate, ease off pressure (especially as the bit breaks through), and never let it bind in the hole.
What burs does a beginner need?
A range of ball/round burs covers most jobs — hole cleanup, casting cleanup and stone seats. Add a cylinder, flame and bud for recesses and channels. A 30-piece assorted set gives you all the common shapes to learn on.
What's a setting bur for?
A setting (hart) bur cuts the bearing — the small ledge inside a setting that a stone's girdle rests on. Ball burs cut seats for cabochons; hart burs cut bearings for faceted stones.
Do I need a pendant motor, or will a rotary tool do?
A hobby rotary tool works to start. A pendant motor (flex-shaft) with a foot pedal gives finer speed control and less vibration, which matters a lot for setting and finishing — worth upgrading to when you're past the basics.
Where to go next
Start with a diamond bur set and a handful of small twist drills, and practise on scrap: drill a clean row of holes, then use a ball bur to bevel and clean each one. Light touch, low speed, let the cutter work.
This is the bridge between cutting metal and setting stones — read bezel setting for beginners next, where the ball bur cuts the seat your stone drops into. And revisit needle files explained for cleaning up around drilled work by hand.
— K.